Published July 20, 2026 11:53AM
No ski is the same, even when two models sit in the same category. At our annual SKI Test, expert testers spend a week on snow trying to capture that difference for you—how a ski feels underfoot, how eagerly it locks into a carve, how much muscle it takes to bend it into a turn. That’s invaluable feedback, but it’s also subjective. Two testers on the same pair of skis can walk away with different impressions of how “stiff” or “responsive” they felt.
That’s the gap the Outside Lab at CU Denver was built to close. Earlier in 2026, we introduced our new Ski and Snowboard Tester and gave you a behind-the-scenes look at its design. Since then, we’ve been fine-tuning the test protocol, run after run, to make sure the numbers it spits out are consistent and repeatable. The goal isn’t to replace our testers—it’s to give their impressions a second, objective data set to stand next to. Where a tester can tell you a ski “feels stiff in the tail,” our machine can tell you exactly how many degrees that tail deflects under a known load, and let you compare that number directly against every other ski we’ve tested.
Take a question like: just how stiff is the Völkl Mantra 88, really? Or one that’s caused actual arguments among our test crew: does the Nordica Enforcer 99 or the Blizzard Rustler 9 take more effort to roll onto edge? Testers have gone back and forth on that one for years, and honestly, both sides had a point, because “how much effort it takes” is exactly the kind of thing that’s hard to pin down by feel alone. That’s a question our lab can now answer with an actual number instead of a raised voice.
In this video, Trevor Young (Lab Manager, CU Denver) and I walk through the test process—what we measure, what we learn, and how it can even help brands build better skis. Here’s the breakdown.
Measurements: Getting the Ski’s True Shape
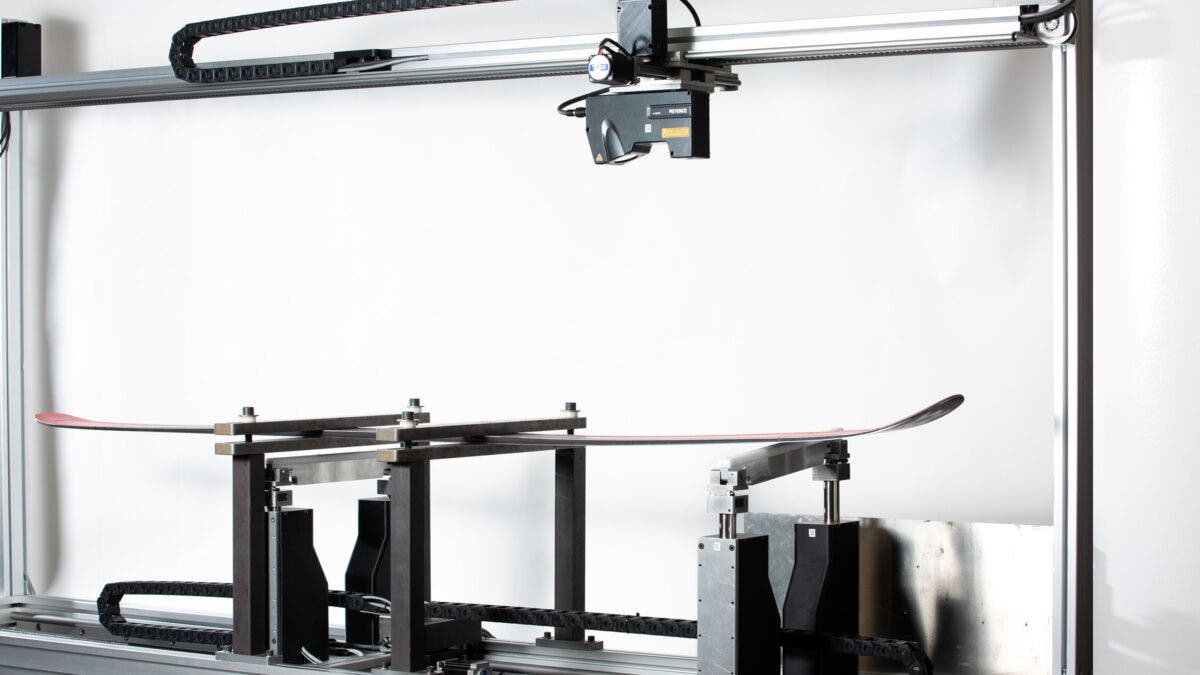
Testing starts with a full length, tip to tail, scan of the ski sitting flat and unconstrained. The contactless scan takes readings at defined intervals, which we control, giving us a closer look at a ski’s overall geometry. These readings are plotted on graphs so we can accurately measure key parameters including length, width, sidecut radius, and camber profile. With this info we can check manufacturer posted dimensions, and dig a little deeper into metrics like camber and sidecut radii that directly affect on-snow performance.
Sidecut
The hourglass shape of a ski—its sidecut—combined with how much of the ski’s edge actually touches the snow (the “effective edge”), determines how naturally a ski wants to turn. What’s usually missing from a spec sheet is exactly where that turning shape is centered underfoot, and, on skis with multiple sidecut radii, where one curve blends into the next. Those details hint at how a ski will want to turn before you’ve even tipped it on edge—the kind of thing a tester might describe as “easy turn initiation” or “sluggish,” now backed by an actual measurement.
Camber Profile
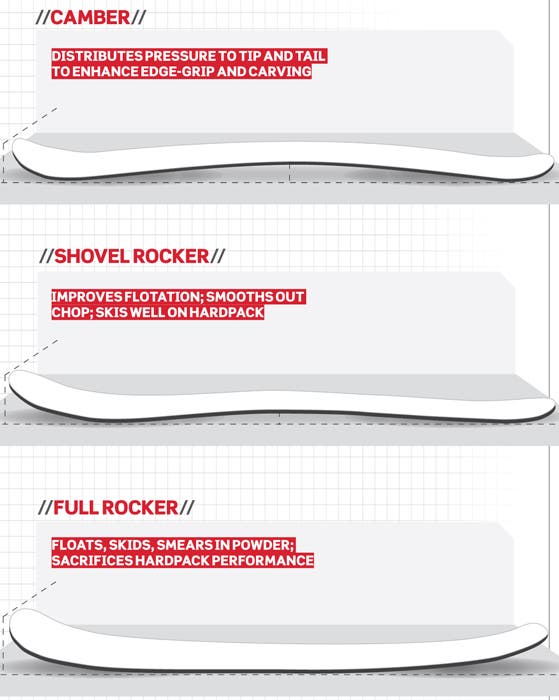
Camber—the gentle upward arch in the middle of the ski you’d see if you set a ski on a flat floor—plays a bigger role in how a ski feels than most people realize, but it’s almost never published. You can eyeball camber height, but that only tells part of the story. Our scanner captures the whole profile: where it peaks, its overall shape, and whether the tip or tail flattens out early (called “early-rise”) before it touches the snow. A more freeride-oriented ski like the Blizzard Rustler 9 typically runs some early-rise at the tip and tail for a looser, more playful feel—and now we can put an actual shape and measurement to that rise instead of just calling the ski “playful” and leaving it there. Combined with our other measurements, this starts to build a real picture of how a ski will behave and the engineering behind what a tester feels as “lively” or “locked-in” underfoot.
This baseline scan also sets up everything that follows: our load tests.
Load Testing: Measuring How the Ski Actually Bends
Once we have the ski’s resting shape on file, we move to load testing to measure stiffness. First, we clamp the ski at the same spots your bindings would sit—using average men’s (26.5) and women’s (24.5) boot-sole lengths—so the ski flexes the way it would with your foot actually in it. Then a scanner slides to the ski’s centerline (or between the clamps, on skis with off-center mounts) to get ready to measure.
We run two different load tests on every ski: bending stiffness and edge engagement. They work in similar ways, but each answers a different question about how the ski behaves on snow.
Bending Stiffness (Flex)
The stiffness of a ski is often subjective, and most people rely on the standard, but very inaccurate, “hand bend” test in the shop: planting the tail of the ski on the ground, holding the tip, and then pushing in the middle to feel how much effort it takes to bend. Unless you’re a robot, this just isn’t an accurate assessment. More importantly, you’re bending the ski in the wrong place. On snow, the flex that matters happens between your heel and the tail, and your toes and the tip—not dead center.
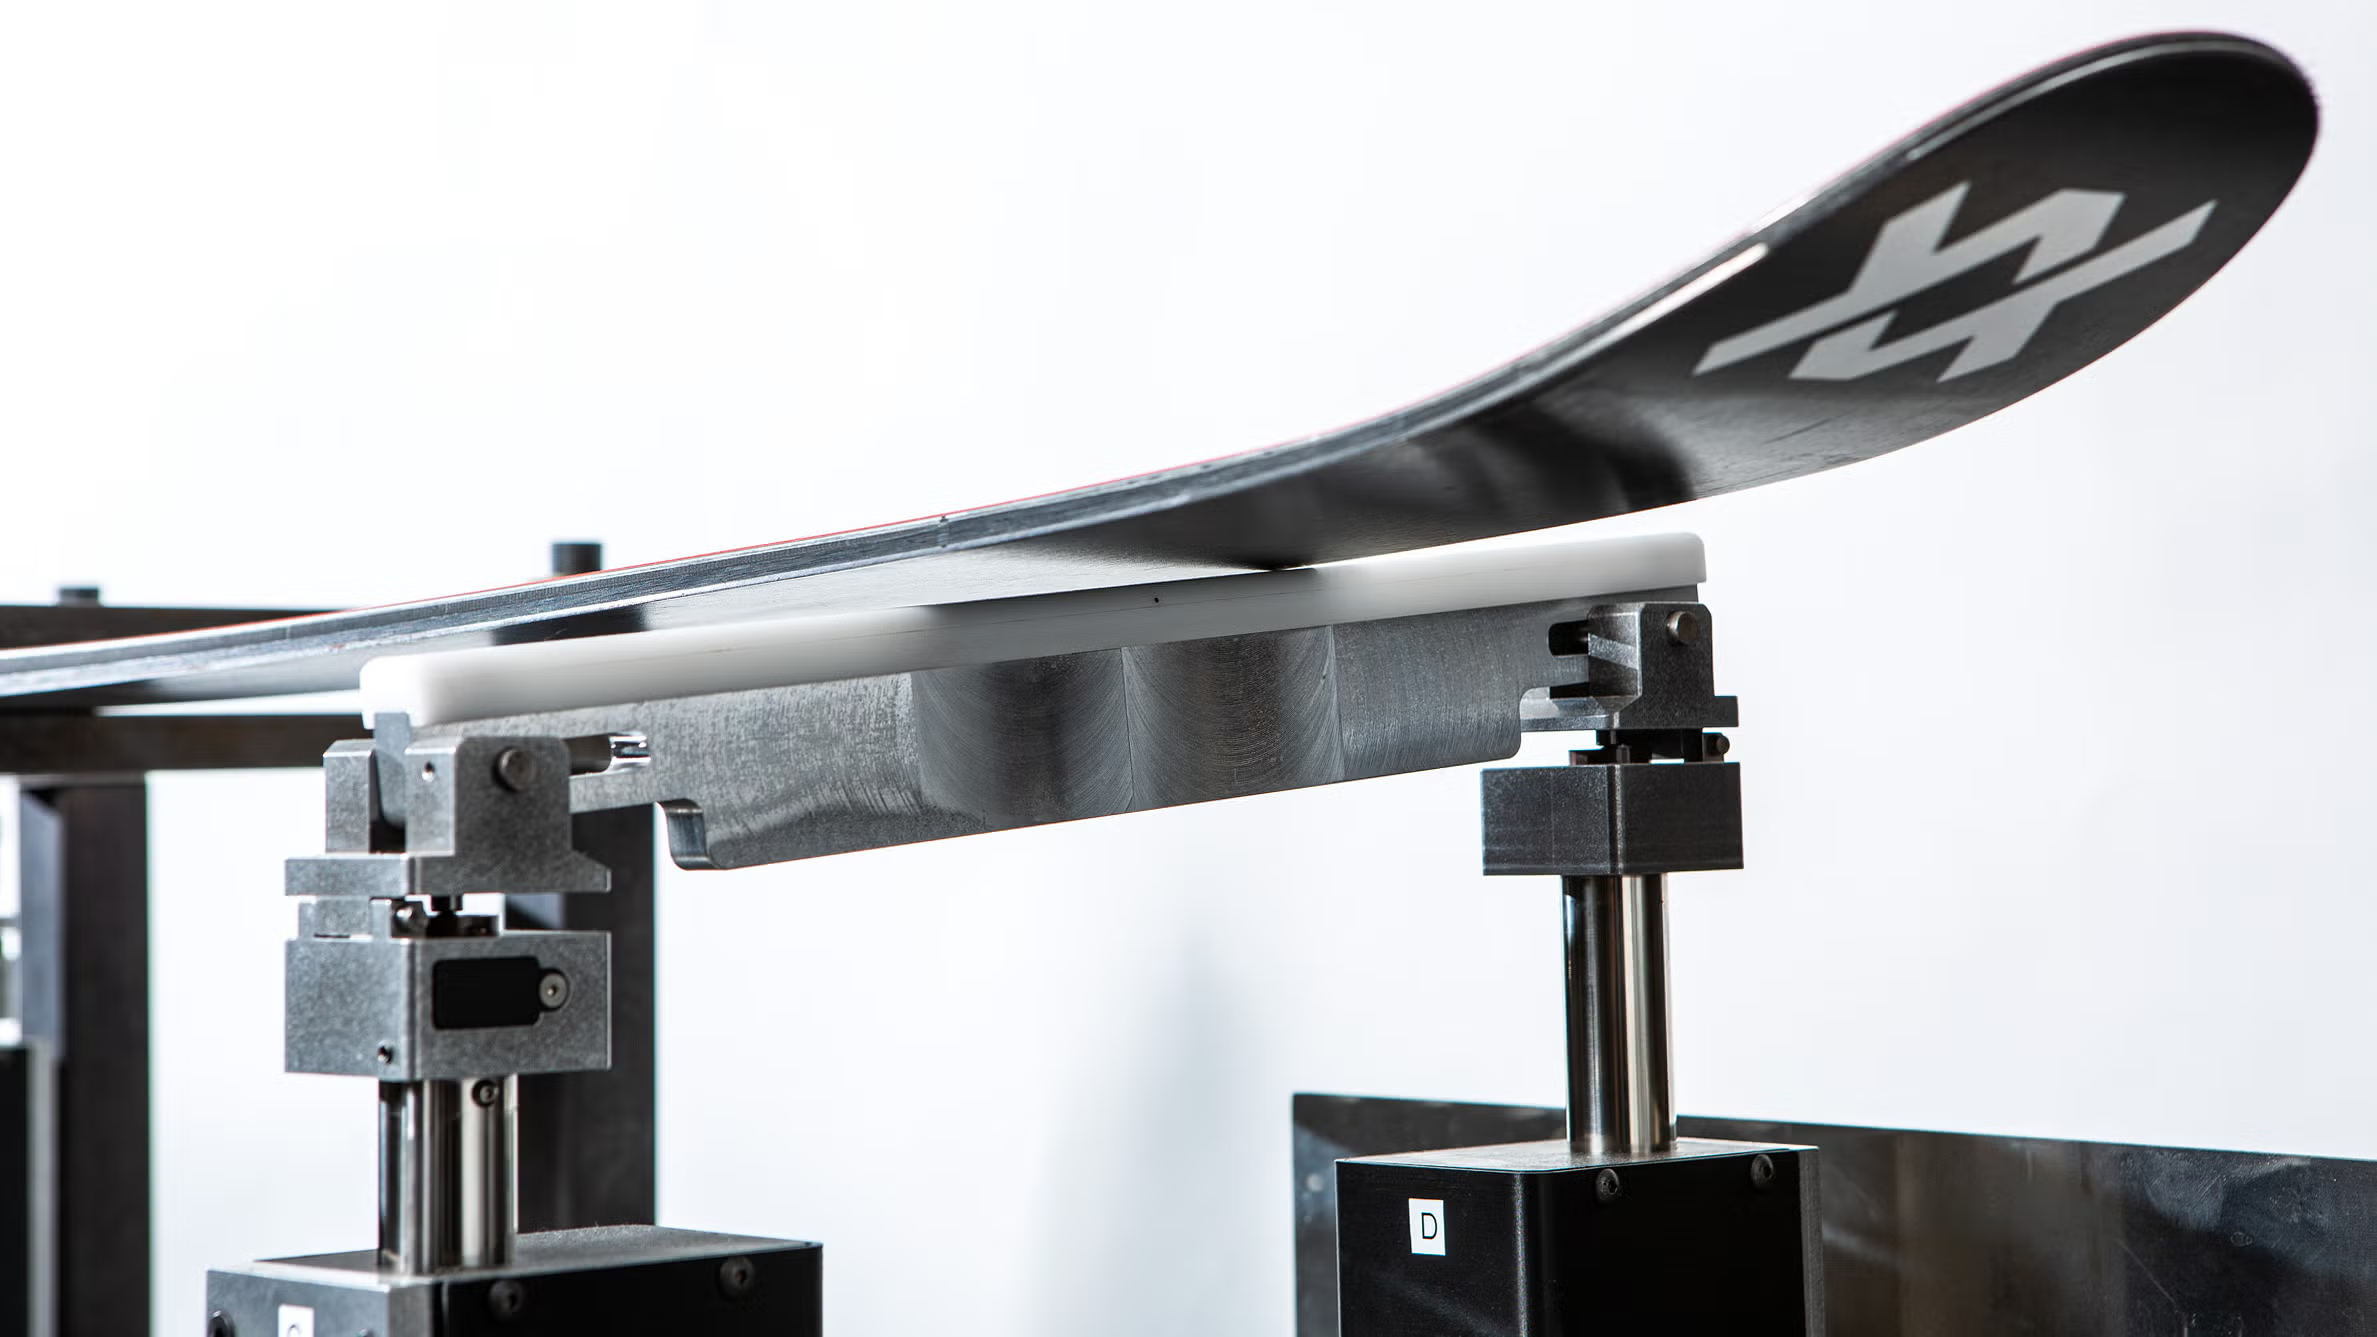
Our lab machine solves both problems. Mechanical actuator arms position themselves right at the tip and tail contact points and push up with a precise, repeatable amount of force, while a load cell confirms exactly how hard they’re pushing. Once that force is applied, the scanner measures how far the ski bent from its resting shape—and because every ski gets pushed with the exact same force, we can stack the results side by side and compare skis directly. We test more than one spot along the ski, too, since stiffness often changes from tip to tail, and a single number wouldn’t capture the full flex profile. This is the data that finally puts a real figure behind a tester calling a ski “soft” or “beefy”—so when a tester tells you the Völkl Mantra 88 feels stout underfoot, we’ll be able to back that up with exactly how much its tip and tail actually deflect under load, not just an impression from one day on snow.
Edge Engagement
That feeling of locking into a clean carve—edges biting, clean tracks laid down the slope— comes down to how much effort it takes to roll the ski onto its edge in the first place. To measure that, we load only one edge of the ski rather than both at once. This isn’t quite “torsional stiffness” in the strict engineering sense (true torsion testing would require clamping at the point of force, essentially twisting the ski), and in practice, skis rarely twist that way on snow anyhow. What actually happens is more of a roll: one edge lifts while the other digs in, and our test is built to capture the force behind exactly that motion.
The setup looks similar to the bending stiffness test, except each carriage now angles the “bridge” connecting its two actuator arms. By adding an angle to the bridge , we can push on just one edge and measure both how much the ski deflects and how much it twists in response. Compared against our baseline scan, that tells us how much effort it really takes to get a ski to engage—the objective version of a tester saying a ski “carves like it’s on rails” or “fights you into the turn.”
What This Means for Our Ski Reviews
Going forward, this lab data becomes another layer in how we evaluate skis—sitting alongside, not replacing, the on-snow impressions our testers have always given you. A tester can tell you how a ski felt on perfect Deer Valley corduroy; our lab can tell you, in hard numbers, how that ski’s tail stiffness or edge engagement stacks up against every other ski in its class. Put together, you get both the feel and the facts.